If you’re scheduling a heat pump installation, you likely want to know: How long does it take to install a heat pump? Typically, the job takes about 4 to 8 hours. However, this can extend depending on your installation’s complexity. Read on to discover the key aspects that influence the timeline – from ductwork to electrical adjustments – without spoiling the finer details or pushing a sale.
Key Takeaways
Heat pump installation is an intricate process that includes pre-installation assessment, old system removal, and new component installation requiring expertise and careful planning.
The installation timeframe is influenced by several factors, such as weather conditions, ductwork modifications, and electrical upgrades, typically taking 4 to 8 hours but can extend over several days.
Post-installation includes crucial system testing, commissioning for operational efficiency, cleanup, and homeowner walkthrough, and our company offers extensive experience, transparent estimates, warranties, and flexible financing options for heat pump installation.
The Installation Process: A Comprehensive Breakdown
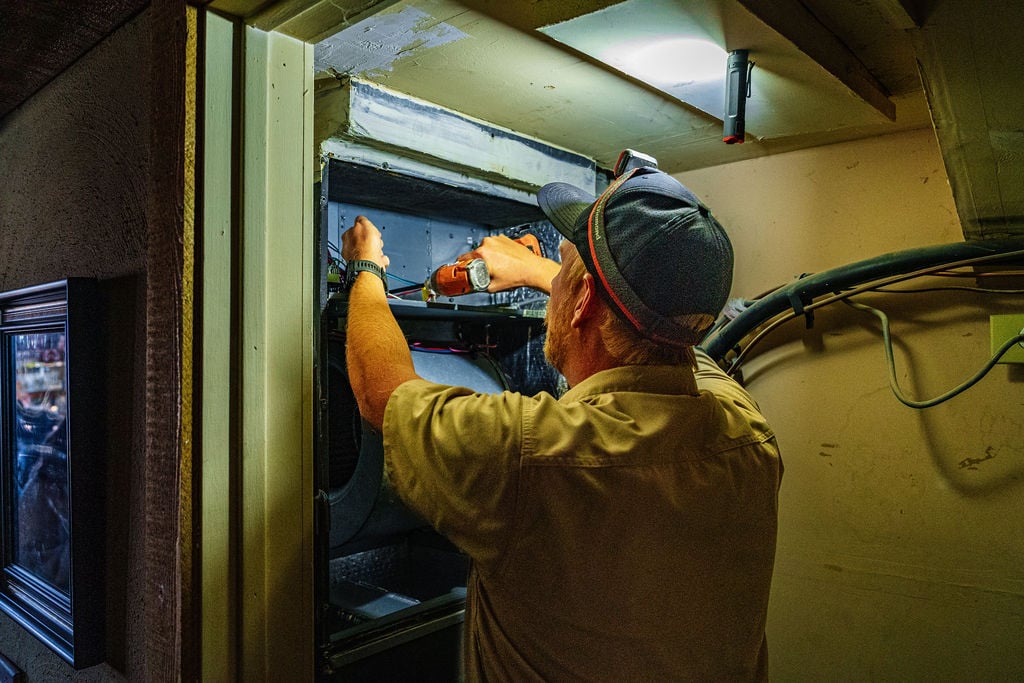
A heat pump installation is no small feat. It’s a complex process that involves careful planning, precision, and expertise. Before the installation of a heat pump, factors such as the heating and cooling needs of your home should be examined. This includes determining the appropriate size and type of heat pump and getting ready for the following installation procedures. This process also involves the removal of any existing air conditioning system to ensure that the new system can be properly fitted and connected without any compatibility issues.
Installing a heat pump entails the setup of both indoor and outdoor units. The pump is connected to the home’s electrical system, and copper lines and service valves are joined to ensure a leak-free connection. These connections are made using a process called brazing, which utilizes a combination of oxygen and acetylene gases along with a filler rod made of an alloy metal and silver.
Lastly, the process is finalized with comprehensive testing and commissioning of the new air handler system to ensure its proper and efficient operation.
Pre-Installation Assessment and Planning
The journey towards a successful heat pump installation kicks off with a thorough pre-installation evaluation and planning. This involves conducting a Manual J load calculation, which helps determine the size and type of heat pump required for a residence by evaluating:
insulation thickness
window sizes
door types
total square footage
other factors to fulfill the homeowner’s comfort requirements.
In addition to the load calculation, the site’s readiness for outdoor units is also evaluated. The following steps are taken to ensure stability and protection for the new heat pump:
The ground is leveled.
A recommended composite pad is selected for the new heat pump to sit on.
In regions like Ohio, it’s advisable to elevate the heat pump about 9 inches above the pad to safeguard it from snow accumulation, which can impact the functionality of the unit.
This is a critical step as it averts potential freezing or air leaks that may hamper the heat pump’s performance.
Removing the Old System
The existing system needs to be safely dismantled before the new heat pump can be fitted. This step includes the following tasks:
Turn off the power to the system to establish a safe working environment.
Use a screwdriver to remove any screws or fasteners holding the system components in place.
Use an adjustable wrench to disconnect any pipes or fittings.
Use a hand truck to transport heavy components, such as the indoor evaporator coil, to a safe location.
Use a vacuum pump to remove any refrigerant from the system.
Use a nitrogen kit to purge the system of any remaining refrigerant or contaminants.
These specialized tools and steps are necessary for the safe and efficient removal of the indoor evaporator coil and other system components.
The removal process entails:
Utilizing a recovery machine to capture and safely remove the refrigerant from the old system.
Disengaging the electrical connections.
Readying the system for removal.
These steps ensure that you can install heat pumps smoothly and safely, with new electrical connections put in place for your new heat pump.
Installing the New Heat Pump Components
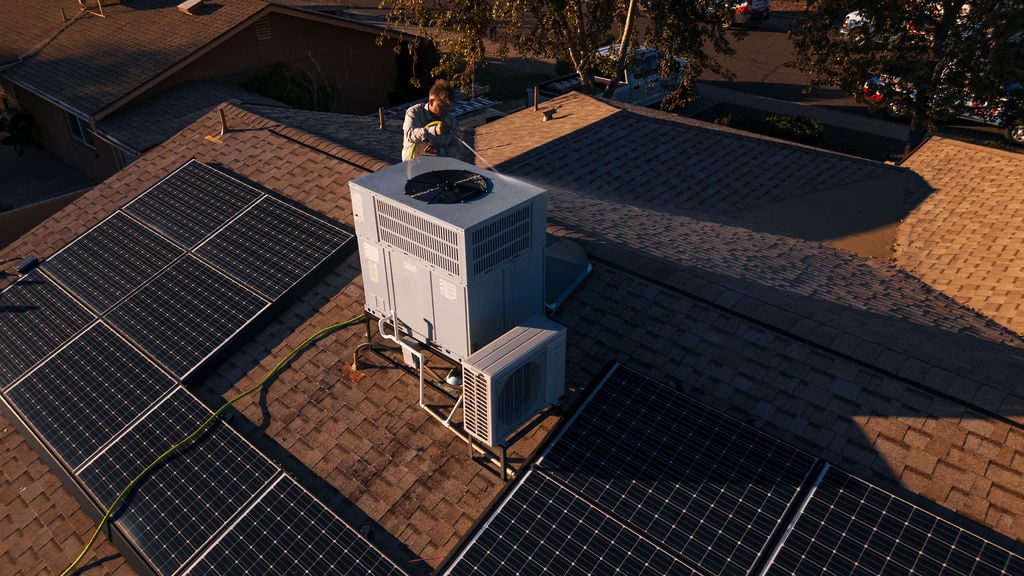
With the safe removal of the old system and site preparation completed, it’s time to begin closing process of installing the new heat pump components. It’s important to ensure the outdoor unit is positioned at a higher elevation than the snow level to ensure efficient operation and minimize snow-related complications.
The indoor unit of an air conditioner typically includes a cased evaporator coil, which enables the system to switch between heating and cooling modes, providing cool air when needed. The refrigerant lines are connected using a process called brazing, which effectively joins the copper line set and service valves, ensuring a long-lasting and leak-free operation of cooling systems.
The installation process for a heat pump typically involves the following steps:
The heat pump is connected to the home’s electrical system.
The thermostat is configured to initiate the heating and cooling cycles of the pump.
An outdoor sensor is installed, which signals the heat pump to transition between heating and cooling modes and activates a defrost mode in low temperatures.
One key difference to consider between air-source and ground-source heat pump installations is that ground-source pumps do not have a visible outdoor unit. Instead, ground loops are buried, unlike air source heat pumps that do have access to an outdoor unit.
Factors Affecting Installation Time
Comprehending the installation process is vital, but it’s equally significant to recognize that several factors can influence the length of a heat pump installation. These include weather conditions, modifications to the ductwork, and electrical upgrades.
Weather Conditions
Weather conditions play a significant role in the efficiency of the heat pump installation process. High humidity or extreme temperatures can affect the efficiency and energy consumption of heat pumps. Despite the challenges, it is possible to conduct heat pump installation in rainy or snowy winter conditions, provided that appropriate precautions are taken to safeguard against moisture.
Safety precautions include:
Covering and insulating pipes to prevent bursting in freezing temperatures
Installing surge protectors to guard against electrical damage
Ensuring that the outdoor unit is clear of snow, ice, and debris to maintain proper airflow.
Ductwork Modifications
Changes to the ductwork might be required during the heat pump installation to manage the increased airflows needed for a bigger heat pump. In certain circumstances, such as commercial HVAC retrofits where issues related to poor air movement, fluctuating temperatures, and high humidity arise, air duct alterations can become more intricate and time-consuming. Such modifications can prolong the installation process if the existing ductwork needs replacement due to poor design or installation, or if extensive modifications are required to support additional airflow.
Keep in mind that, within a heat pump system, ductwork serves the purpose of distributing conditioned air through the home’s vents and ducts.
Electrical Upgrades
Electrical upgrades are often required during a heat pump installation to accommodate the higher power demands of a new heat pump system and to ensure a secure and compliant installation. These upgrades typically involve verifying the unit’s rated voltage and frequency, addressing any safety concerns, and potentially modernizing the electrical panel, especially in older residences. Some of the typical electrical challenges that may arise during the installation include issues with wiring, loose terminals, damaged circuits, and blown fuses or circuit breakers.
These essential modifications can contribute to the overall installation duration and can vary significantly, ranging from as little as six hours to several days. Furthermore, insufficient electrical upgrades can lead to problems such as:
improper installations
decreased efficiency
excessive system cycling
inadequate dehumidification
possible incompatibility with existing ductwork.
Typical Installation Duration and What to Expect
Having grasped the intricacy of the heat pump installation process and the factors that impact the timeline, you might be curious about the typical duration of heat pump installation. The installation process usually takes approximately eight hours. However, the duration can be influenced by various factors such as:
The type of heat pump unit
The quality of installation
Climate conditions
Usage patterns
Regular maintenance
Average Installation Timeframe
While it’s challenging to pinpoint an exact timeframe, the installation of a heat pump can vary from 4 to 8 hours to several days, depending on the type of installation and the need for new ducting. Factors such as the complexity of the HVAC system, the number of components, ductwork, and wiring involved, and whether it is a brand new installation or a replacement, can all influence the duration of the installation.
Modifications to the ductwork and electrical upgrades can even extend the installation process by approximately one day each.
Day-of Installation Activities
On the day of installation, homeowners should ensure that there is a clear path both indoors and outdoors for the installation team. They should also clear sufficient space for the equipment at the installation site. The installation team will then replace the old pad with a new one on which the heat pump will be placed, ensuring that it is properly sized and leveled. It’s recommended that this task be performed by professional installers to ensure optimal installation.
Post-Installation Steps and Commissioning
With the new heat pump in place, the job isn’t finished. A number of steps must be followed post-installation to guarantee the system’s correct and efficient operation. This includes system testing, commissioning, test, and clean-up.
System Testing and Commissioning
A comprehensive system testing and commissioning are necessary to assure the heat pump’s proper functioning. Commissioning guarantees that the equipment is functioning in accordance with the manufacturer’s specifications, thereby ensuring long-term efficiency and system health. The typical heat pump commissioning process includes:
Configuring the correct settings for the indoor unit
Ensuring appropriate air delivery
Testing the system sequence of operation
Checking thermostat operation
Other related functions
This comprehensive testing procedure can take up to two hours.
Clean-Up and Review with the Homeowner
After the system testing and commissioning are complete, a clean-up process follows. The clean-up process includes:
Removal of all materials and old equipment
Rolling up floor protection
Sweeping all areas
Conducting a walkthrough with the homeowner to ensure their satisfaction and understanding of their new system.
It’s also important for the homeowner to understand how to operate and maintain the heat pump after it has been installed.
Why Choose Our Company for Your Heat Pump Installation?
If you’re considering installing a heat pump in house, here are a few reasons why you should choose our company for the job:
Extensive expertise in heat pump installation
Transparent estimates to ensure you know exactly what you’re paying for
Flexible financing options to fit your budget
With these advantages, we stand out from the competition.
Expertise and Experience
With abundant expertise and experience in the HVAC industry, our company holds an EPA certification, an A+ BBB rating, and is fully licensed and bonded. This demonstrates our high level of knowledge, experience, and commitment to quality.
Over the years, we have successfully repaired 2,300+ HVAC systems and handled 500+ emergency repairs, showcasing our ability to promptly address issues and provide reliable and effective service.
Transparent Estimates and Warranties
Recognizing that the expense of a heat pump installation can be substantial, we are dedicated to offering clear estimates and warranties. Our warranties typically extend coverage to defective parts for up to 10 years, excluding labor or installation expenses.
Additionally, we provide a 1-year workmanship guarantee as part of our transparent service.
Flexible Financing and Fast Installation
In acknowledgment of the necessity for financial flexibility, we provide various financing options like personal loans, HVAC loans, and programs similar to those offered by GreenSky.
We also pride ourselves on our promise of prompt installation. Our dedicated team of experienced installers ensures that your heat pump installation is completed within 24-48 hours.
Summary
In conclusion, understanding the heat pump installation process and timeline is key to a successful project. From the pre-installation assessment to the post-installation steps, several factors can impact the duration of the installation. Weather conditions, ductwork modifications, and electrical upgrades can all affect the timeline. However, by choosing a reliable, experienced, and transparent company for your heat pump installation, you can rest assured that your new system will be installed efficiently and correctly.
Frequently Asked Questions
How long does it take for heat pumps to be installed?
Heat pump installation typically takes about three to four hours, and may take a full day if new ductwork is needed.
How many people does it take to install a heat pump?
It usually takes a team of three people to install a heat pump in your home – a heating engineer, an electrician, and an improver, with a possible trainee engineer on site. Having a knowledgeable team ensures a successful installation without compromising safety or quality.
Are heat pumps difficult to install?
Yes, heat pumps are more difficult to install than one might think due to the complexity of their parts and functionality. It is advisable to call a professional for installation.
What is the significance of the Manual J load calculation in the planning of heat pump installation?
The Manual J load calculation is essential in determining the correct heating and cooling equipment for a residence based on various factors, including insulation, window sizes, and overall square footage, ensuring the proper installation of a heat pump.
What is the significance of having EPA certification for an HVAC company’s expertise?
Having an EPA certification in the HVAC industry demonstrates a high level of knowledge and experience in environmental impacts of refrigerants and methods to mitigate them, showcasing expertise in the field.