Table of Contents
I. Benefits Of Replacing Your HVAC System?
A working and efficient heating, ventilation and air conditioning (HVAC) system is key to a comfortable home. Your HVAC system controls temperature, humidity and air circulation and ventilation. When an HVAC system starts to fail or gets old it can cause all sorts of problems, temperature inconsistency, higher bills and even health issues from poor indoor air quality.
Replacing an old or inefficient HVAC system is a smart investment that can pay big dividends (See blog: HVAC Replacement vs. Repair: How to Decide). A new high efficiency HVAC system can save you hundreds or even thousands of dollars a year. Modern HVAC systems are also quieter, have better temperature control and improve indoor air quality by filtering out pollutants and allergens.
While the upfront cost of an HVAC replacement is big, the long term savings and comfort make it a good investment for many homeowners. By knowing the signs that your HVAC system needs to be replaced, the types of systems available and the replacement process you can make an informed decision that fits your needs and budget.
In this article we’ll go over the signs your HVAC system needs to be replaced, the types of HVAC systems out there and the whole replacement process from quote to final installation and setup. Whether you’re dealing with frequent breakdowns, high bills or just want to upgrade to a more efficient and modern system, this will give you the information you need to navigate the HVAC replacement process.
II. Signs Your HVAC System Needs to be Replaced
While regular maintenance can extend the life of your HVAC system, even the best maintained units will eventually reach the end of their life. Knowing the signs your HVAC system needs to be replaced because it’s failing or near the end of its life is key to avoiding breakdowns and a comfortable home. Here are some of the signs:
Age of the System
Most HVAC systems have a life expectancy of 15-20 years for furnaces and air conditioners and 10-15 years for heat pumps. As your system gets near or exceeds these age ranges it becomes more prone to breakdowns and less efficient even with regular maintenance.
Frequent Breakdowns and Repairs
If you’re calling for HVAC repairs more often it may be a sign your system is nearing the end of its life. Recurring issues with compressors, heat exchangers or blowers can get costly fast and may mean a full system replacement is the better option.
High Bills Despite Maintenance
As HVAC systems get old they become less efficient and your bills go up. If you’ve seen a big increase in your bills despite regular maintenance and no changes in usage it may be due to an old inefficient system.
Poor Heating/Cooling Performance
If your HVAC system can’t maintain temperatures throughout your home or certain rooms are always too hot or too cold it may be a sign the system is undersized or losing its ability to perform.
Weird Noises, Smells or Visible Damage
Weird noises like banging, squealing or rattling can mean worn out parts or potential safety issues. Strange smells or visible damage like cracks or rust can mean your HVAC system is failing and needs to be replaced.
Replacement Parts
As HVAC systems get old replacement parts become harder to find especially for older or discontinued models. If your system needs a hard to find part it may be more cost effective to replace the whole unit rather than spend on an expensive repair.
If you see any of these signs you need to have a professional HVAC technician inspect your system and give you an assessment of its condition. They can help you decide if a repair or full system replacement is the way to go based on age of the system, severity of the issues and cost involved.
III. Types of HVAC Systems
When replacing your HVAC system you need to know the different types of systems out there. Each system has its own features, advantages and considerations and choosing the right one for your home can make a big difference in comfort, energy efficiency and cost.
A. Central Forced Air
Central forced air is the most common type of HVAC system in residential and commercial buildings. These systems use a network of ducts to distribute conditioned air throughout the building.
1. Furnaces
Furnaces are the heating component of a central forced air system. They burn fuel (natural gas, propane or oil) to produce heat which is then distributed through the ductwork. Furnaces can be paired with an air conditioner or heat pump for full heating and cooling.
2. Air Conditioners
Air conditioners cool and dehumidify the air in a central forced air system. They remove heat and moisture from the indoor air and transfer it outside. Air conditioners are paired with a furnace or heat pump for full heating and cooling.
3. Heat Pumps
Heat pumps are a versatile HVAC solution that can provide both heating and cooling. They transfer heat from one location to another instead of generating heat. In the summer they remove heat from the indoor air and transfer it outside for cooling. In the winter they extract heat from the outdoor air (or ground in the case of geothermal heat pumps) and transfer it inside for efficient heating.
4. Packaged Units
Packaged units are self contained HVAC systems that combine the functions of a furnace, air conditioner and sometimes a heat pump into one unit. These units are installed outside the building and connected to the ductwork. Packaged units are good for smaller buildings or when space is limited.
Central forced air systems have several advantages such as even temperature distribution throughout the building, ability to control humidity levels and option to integrate air filtration systems for better indoor air quality. However they require a network of ducts which can be costly to install or modify and may not be suitable for certain types of buildings or layouts.
When replacing your HVAC system with a central forced air you need to work with a professional HVAC contractor to determine the right system type, size and efficiency rating for your specific heating and cooling needs, budget and energy efficiency goals.
B. Room/Zone Systems
Room or zone HVAC systems condition individual rooms or zones within a building instead of the entire space through a central system. One type of room/zone system is the ductless mini-split system.
Ductless Mini-Split Systems
Ductless mini-split systems are a popular choice for room or zone level heating and cooling especially in homes or buildings without existing ductwork or where installing ductwork is impractical or too expensive.
A ductless mini-split system consists of an outdoor condensing unit and one or more indoor air handlers connected by a refrigerant line set. The outdoor unit houses the compressor and condenser, the indoor units are mounted on walls or ceilings and distribute conditioned air directly into the room or zone they serve.
One of the main advantages of ductless mini-splits is the ability to have independent temperature control for each zone or room. This allows homeowners or occupants to heat or cool specific areas as needed instead of the entire building and potential energy savings.
Ductless mini-splits come in various configurations:
- Single-Zone Systems: One outdoor unit connected to one indoor air handler for one room or zone.
- Multi-Zone Systems: One outdoor unit connected to multiple indoor air handlers, 2-8 zones. Multi-zone systems allow for independent temperature control in each zone, good for homes or buildings with different heating and cooling needs in different rooms or areas.
- Ducted Mini-Splits: While most mini-splits are ductless, some can be connected to short runs of ductwork for more discreet air distribution in a room or zone.
Ductless mini-splits have several advantages, easy installation (no ductwork required), high energy efficiency and flexible zoning. However they may have limited cooling or heating capacity for larger spaces and the indoor units can be visually obtrusive in some cases.
When replacing your HVAC with a ductless mini-split you need to work with a professional contractor to determine the right system size, number of zones and the right indoor unit types and locations for your specific needs and building layout.
IV. The HVAC Replacement Process
Replacing an HVAC system is a big investment and a multi-step process that requires planning and execution. Knowing what to expect at each stage will help ensure a smooth installation.
A. The Proposal Process
The first step in the HVAC replacement process is to meet with a professional HVAC contractor to discuss your needs, evaluate your home or building and get a proposal.
1. Meeting with an HVAC Consultant
Your HVAC contractor will schedule an on-site visit to assess your current system, take measurements and gather information about your specific needs. During this meeting be prepared to discuss your goals for the new system, such as energy efficiency, comfort issues or advanced features like smart thermostats or air quality enhancements.
2. Discussing Priorities (Efficiency, Budget, Technology)
The consultant will work with you to determine your priorities for the new HVAC system. This may include discussing your desired level of energy efficiency (and the cost), your budget and any technology or feature preferences.
3. Choosing Equipment Type and Size
Based on the information gathered the contractor will recommend the right type of HVAC system for your needs, a furnace and air conditioner, a heat pump or a ductless mini-split system. They will also do load calculations to determine the right size and capacity of the equipment so it can heat and cool your space without being too big or too small.
4. Cost Estimate
After the consultant has determined your needs and chosen the equipment, they will provide you with a detailed estimate for the HVAC replacement project. This estimate should include the cost of the new equipment, any ductwork modifications or upgrades, labor costs for installation and any additional fees or permits required.
During the proposal process be sure to ask questions, clarify any unknowns and make sure you understand the scope of work, the equipment being recommended and the cost. This will help you make an informed decision and set the right expectations for the project.
B. Installation Preparation
Once you’ve accepted the proposal the next step is to prepare for the actual installation of your new HVAC system. Proper preparation is key to a smooth installation process.
1. Scheduling Installation
Your HVAC contractor will work with you to schedule the installation at a time that’s convenient for you. Depending on the scope of the project the installation may take a few days to complete. Make sure to plan accordingly and make any necessary arrangements, such as taking time off work or making alternative living arrangements if the installation will impact your daily routine.
2. Permitting
Depending on your local codes and regulations you may need to get permits before the installation can start. Your HVAC contractor will usually handle the permitting process for you but it’s good to know what’s required and what the fees are.
3. Ductwork Modifications
If your existing ductwork needs to be modified or replaced to fit the new HVAC system your contractor will assess the necessary changes during the proposal process. Ductwork modifications can be a big part of the installation process and may involve cutting into walls, ceilings or floors to access and modify the ductwork.
During the installation preparation phase your contractor may need to order materials or schedule additional subcontractors if needed.
Make sure to discuss any disruptions or changes to your living or work space with your contractor during this phase. They should give you a clear understanding of what to expect and what you need to do to prepare, such as clearing access to certain areas or protecting valuable items from dust and debris.
By preparing for the installation you can help make the process smoother and reduce any potential delays or issues. Open communication with your HVAC contractor during this phase is key to get any questions or concerns addressed before the installation starts.
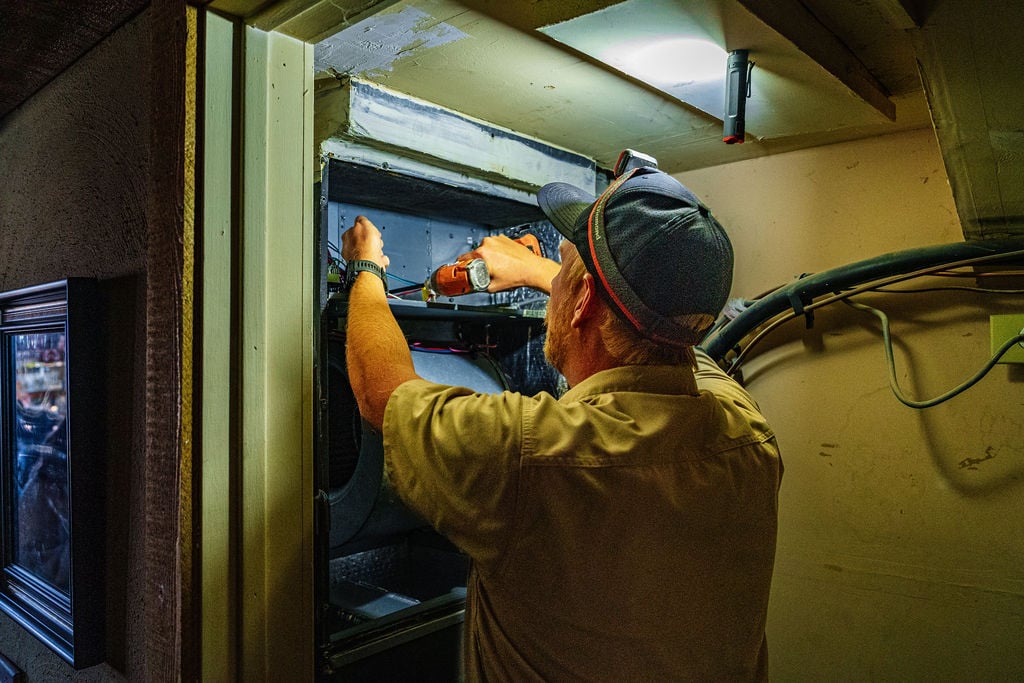
C. Installation
1. Remove Old Equipment
Before the new system can be installed the HVAC technicians will need to remove your old equipment. This may involve disconnecting electrical connections, refrigerant lines and ductwork and carefully removing the old furnace, air conditioner or other components.
Proper removal and disposal of the old equipment is key to a safe and efficient installation. Your contractor should follow local regulations and best practices for handling and disposing of any hazardous materials such as refrigerants or mercury containing components.
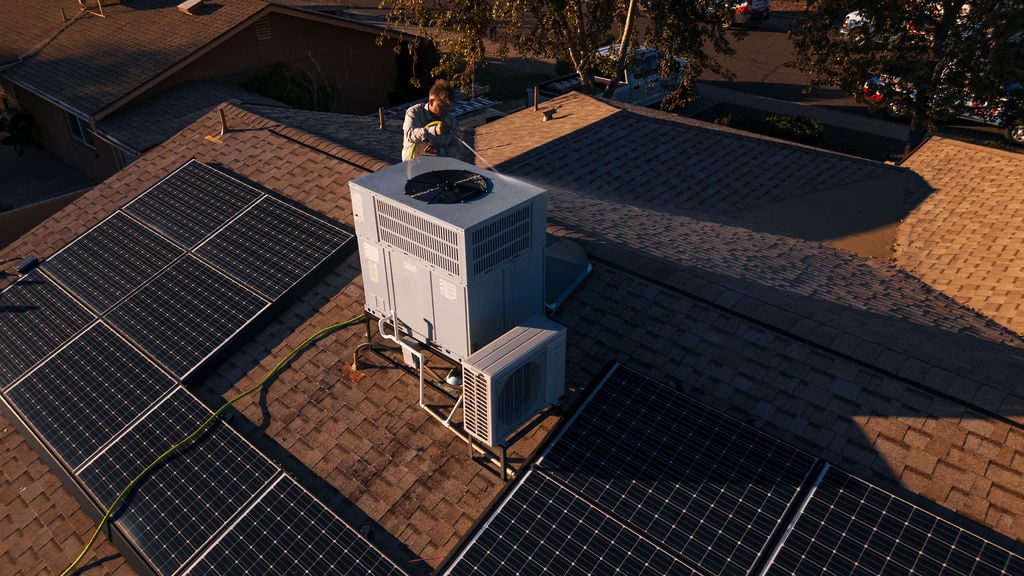
2. Install New Equipment
Once the old equipment is removed the new HVAC system can be installed. This will involve positioning the new outdoor unit (if applicable) and indoor components such as the furnace or air handler in their designated locations.
Depending on the type of system being installed this may also involve running new ductwork, refrigerant lines or electrical wiring to connect the different components.
3. Connect Ductwork, Refrigerant Lines and Drainage
If your new HVAC system requires ductwork modifications or replacement the technicians will connect the new ductwork to the indoor and outdoor units. This may involve cutting and sealing ductwork sections, installing new registers or grilles and ensuring proper airflow throughout the system.
For systems with refrigerant lines such as air conditioners or heat pumps the technicians will run and connect the refrigerant lines between the indoor and outdoor units following proper procedures to ensure a leak free and efficient system.
Drainage is also important for HVAC systems especially for air conditioners and heat pumps that remove moisture from the air. The technicians will install or connect the condensate drain lines to ensure proper drainage and no water damage.
4. Install Thermostat and Accessories
Once the main components of the HVAC system are installed and connected the technicians will install the thermostat or control system. This may involve running new wiring and programming the thermostat to communicate with the different components of the system.
If you have any additional accessories such as air purifiers, humidifiers or zoning systems the technicians will also install and integrate these into the overall HVAC system during this phase.
Throughout the installation process your HVAC contractor should keep you informed of the progress and address any questions or concerns you may have. They should also take care to contain dust and debris, protect your living or work space and ensure a safe and efficient installation.
D. Start Up and Testing
Once the new HVAC system is installed the next step is to start up the system and test it thoroughly to ensure it’s working correctly and efficiently.
1. Turn on the New System
The HVAC technicians will turn on the new system following the manufacturer’s instructions. This may involve checking electrical connections, checking refrigerant levels (if applicable) and making sure all components are communicating with the control system.
2. Check Operation Points (Airflow, Temperatures, etc.)
Once the system is turned on the technicians will perform a series of tests to check various operation points to ensure the system is working as designed. These tests may include:
- Measuring airflow at supply and return registers to ensure proper air distribution and balance
- Checking temperatures at different points in the system, supply air, return air and refrigerant lines
- Monitoring system pressures and refrigerant levels (for air conditioners and heat pumps)
- Testing safety controls and emergency shut-off mechanisms
- Verifying operation of any additional accessories or features, air purifiers or zoning systems
During these tests the technicians will be looking for any abnormalities or deviations from the expected performance parameters which may indicate problems that need to be addressed.
3. Make Adjustments
Based on the test results and operation checks the technicians may need to make adjustments to the system to get it running optimally. These adjustments may include:
- Balancing airflow by adjusting dampers or register openings
- Re-calibrating or re-programming the thermostat or control system
- Adjusting refrigerant levels or system pressures
- Tightening or securing loose connections or components
These adjustments will get the HVAC system running at its best and providing the heat, cool and air distribution you need in your home or building.
Throughout the start up and testing process your HVAC contractor should keep you informed and explain any adjustments or issues that need to be addressed. They should also give you instructions on how to operate and maintain the new system and any documentation or warranty information.
Proper start up and testing is critical to the long term performance and efficiency of your new HVAC system and should be done by trained and experienced technicians.
E. Clean up and Final Walkthrough
After the installation, start up and testing of your new HVAC system the final step is the clean up and final walkthrough with your HVAC contractor.
1. Remove Debris and Protective Materials
During the installation the technicians used protective materials such as drop cloths or plastic sheeting to protect your living or working space. They will remove these materials and clean up any debris, dust or other materials that may have accumulated during the installation.
Make sure to inspect the work areas and be satisfied the clean up is complete before finalizing the project.
2. Explain Operation, Maintenance and Warranty
Once the clean up is complete the HVAC contractor should give you a comprehensive walkthrough of the new system. This will include:
- How to operate the thermostat or control system, including programming schedules and adjusting settings
- Show you any additional features or accessories, air purifiers or zoning systems
- Give you instructions on how to maintain and care for the system, including filter changes, cleaning procedures and recommended service intervals
- Review the manufacturer’s warranty and any additional warranties or guarantees the contractor provides
Now is the time to ask any remaining questions you may have about the operation, maintenance or warranty of your new HVAC system. It’s important to know how to take care and maintain your investment so it lasts and runs optimally.
3. Final Payment/Financing
Assuming you are happy with the installation and the contractor has addressed any outstanding issues the final step is to pay. The HVAC contractor should give you a detailed invoice showing the total cost of the project including any additional charges or fees.
If you have financing or a payment plan the contractor should review the terms and make sure you understand the payment schedule and any interest rates or fees.
Make sure to review the final invoice carefully and ensure all charges are correct and in line with the original proposal or any changes agreed to. Once you are happy you can make the final payment or finalize the financing.
By completing the clean up, final walkthrough and payment process you can now consider the HVAC replacement project complete and start enjoying your new system.
V. HVAC Replacement Costs
Replacing your HVAC system is a big investment but understanding the HVAC replacement cost factors (LINK) will help you make an informed decision and budget accordingly. Several factors go into the final cost of an HVAC replacement project.
A. Equipment and Efficiency Rating
The type of HVAC system you choose and its efficiency rating will play a big role in the cost. Different systems such as furnaces, air conditioners, heat pumps or ductless mini-splits have different price ranges. More energy efficient models with higher SEER (Seasonal Energy Efficiency Ratio) or AFUE (Annual Fuel Utilization Efficiency) ratings cost more upfront but will save you money in the long run on your energy bills.
B. Unit Size and Home’s Heating/Cooling Load
The size of the HVAC unit for your home is determined by square footage, insulation levels and climate. Proper sizing is critical to ensure efficiency and comfort. A unit that is too small will struggle to maintain desired temperatures and a unit that is too large will cycle inefficiently and use more energy. An HVAC professional will do load calculations to determine the right size for your home.
C. Ductwork Modifications
If your existing ductwork needs to be modified, repaired or replaced to fit the new HVAC system it can add to the overall cost. Ductwork modifications may involve cutting into walls, ceilings or floors which can increase labor and material costs. In some cases homes without existing ductwork may require a complete ductwork installation which will add to the project cost.
D. Labor
Labor costs for HVAC installation can vary depending on the complexity of the project, the contractor’s experience and the local market rates. Proper installation is critical to ensure the system runs efficiently, lasts and meets building codes and safety regulations. Experienced and reputable HVAC contractors may charge more for labor but they will do the work right and ensure the system is installed correctly.
E. Add-ons (Smart Thermostats, Air Quality Accessories)
Adding features or accessories to your HVAC system will enhance its performance but will also add to the overall cost. Smart thermostats, air purification systems, humidifiers or zoning systems are examples of add-ons that will improve energy efficiency, indoor air quality and comfort. But these extras come with their own cost for equipment and installation.
By understanding these factors you can work with your HVAC contractor to determine the right system for your needs and budget. You need to consider not only the upfront cost but also the long term operating cost and potential energy savings to make an informed decision on your HVAC replacement investment.
VI. Conclusion
Replacing your HVAC system is a big investment but one that will give you many benefits and keep your home comfortable and energy efficient for years to come.
A. Benefits of a New HVAC System
A new high efficiency HVAC system will give you:
- Improved Energy Efficiency: Modern HVAC systems are designed to run more efficiently, use less energy and lower your utility bills.
- Enhanced Comfort: A properly sized and installed HVAC system will maintain consistent temperatures throughout your living or working space, no hot or cold spots.
- Better Indoor Air Quality: Many new systems have advanced air filtration technologies to remove pollutants, allergens and other contaminants from the air you breathe.
- Increased Reliability: Replacing an old or failing HVAC system with a new high quality unit will give you peace of mind and reduce repair costs.
- Quieter Operation: Newer HVAC systems are designed to run quieter, less noise in your home.
B. Professional Installation
While the upfront cost of a new HVAC system seems high, proper installation by a professional contractor is critical to get the most out of your investment. A trained HVAC technician will:
- Size the system for your specific heating and cooling needs to avoid inefficiencies and discomfort.
- Install the equipment according to manufacturer specs and local building codes for safety and performance.
- Configure and calibrate the system for maximum energy efficiency and comfort.
- Give you guidance on how to operate, maintain and warranty information.
Installing an HVAC system yourself or hiring an inexperienced contractor can lead to mistakes, poor performance and safety hazards.
C. Maintaining the New System
To get the most out of your new HVAC system, you must follow the recommended maintenance schedule. Maintenance will:
- Run the system at peak performance, reduce energy consumption and utility bills.
- Catch issues before they become major problems, avoid costly repairs or premature system failure.
- Improve indoor air quality by keeping components clean and functioning properly.
- Validate warranty by showing maintenance has been done.
Your contractor can give you the recommended maintenance schedule and tasks or you can enroll in a maintenance program to make sure your system gets the care it needs.
By getting a new high efficiency HVAC system, hiring a professional for installation and following a maintenance schedule you’ll have a comfortable living or working space and lower energy bills and longer life of your investment.